Print Guide

Our print guide will show you how images need to be formatted for the best results for your projects.

File Formats

Photos/Artwork: We accept any of the following formats: .jpg, .eps, .tif, and .psd.

Text Documents: We accept any of the following formats: .doc, .docx and .pdf.

Note: When submitting your Photos and/or Artwork, please keep in mind it must be high resolution. If you have a Text Document in another format other than the ones listed, we encourage you to create an editable .pdf file.

Sample72dpi Sample300dpi

Resolution

Resolution is measured in DPI – Dots Per Inch or PPI – Pixels Per Inch and can be described as the number of dots that fit into a one-inch space. Generally, the more dots per inch means a more detailed and crisp image.

Rules to go by: Optimum printing requires an image to be at LEAST 300dpi. For images that are not 300dpi – Increasing a low resolution (dpi) image to a higher dpi this creates a blurry and less detailed image.

Note: Pulling images from the internet to use for your project isn’t recommended unless they are HIGH Resolution, 300dpi. Low resolution images should be replaced with a new photo or image entirely to guarantee that the resolution is 300 dpi or higher.

Color Mode

There are two predominant types of color modes. RGB – Red, Green, Blue is used for web production and CMYK – Cyan, Magenta, Yellow, Black, which is used for print.

If you submit images that are in RGB or Pantone, they will be converted to CMYK during the design and print process.

Rules to go by: For printing, always use CMYK for the best results. Hard copy photos are recommended for any job that is color specific. Hard copy photos are the only way to ensure an accurate outcome that you are expecting.

Note: Converting images from one color mode to another, such as RGB to CMYK may result in a color shift or complete loss in some of the colors all together.
Sample300dpiRGB Sample300dpiCMYK

Bleed, Final Trim and Live Area

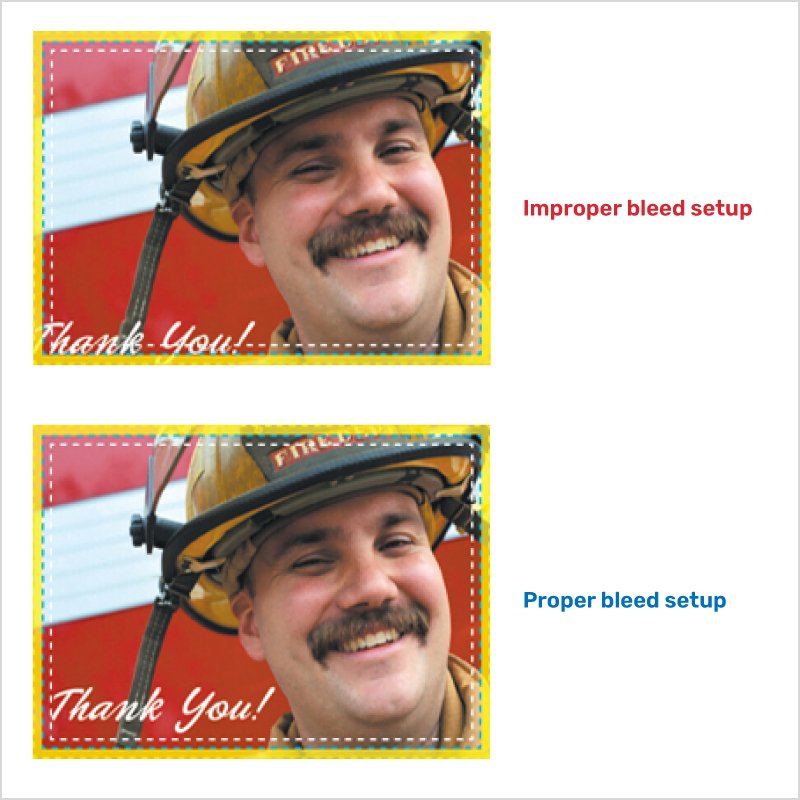
Bleed: Artwork that extends beyond the edge of the sheet before it gets trimmed. The Yellow Outline represents the Bleed area.

Final Trim: The imaginary line around a printed piece that will be trimmed, during the final steps of production. The Blue Dotted Line represents the Final Trim.

Live Area (Safe Zone): The area inside the trim line where your text and graphics are safe from not being cut off. The White dotted line represents the Live Area/Safe Zone.

Rules to go by: Always have a high resolution image/artwork that extends off the edge at least 1/8 in. Never have text at the very edges of your artwork, can not guarantee they won’t get cut off.

Note: Example: 4in. x 6in. postcard with a full bleed should have an image size of 4.25in. x 6.25in. Your text should be at least 0.125in inside the Final Trim in order to guarantee your text will not be trimmed from your artwork.